 USD
USD EUR
EUR GBP
GBP CAD
CAD AUD
AUD JPY
JPY
Introduction
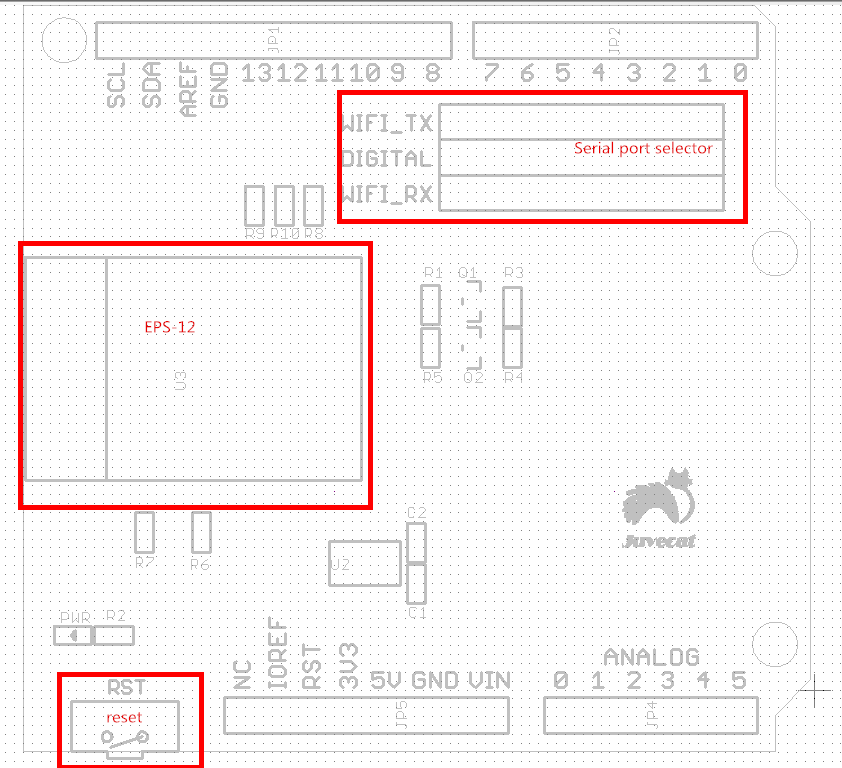
This Wi-Fi Shield utilizes a ESP12 Wi-Fi module to provide your Arduino/ Catduino with serial Ethernet's function. Carry on an independent antenna makes it easily to cover wider range and transmit more stronger signal. For the support of TCP, UDP and FTP communication protocols, this Wi-Fi Shield can meet the needs of most wireless network projects, such as smart home networks, robot controls and personal weather stations, etc. We prepared an easy and convenient command set for this shield so that you can use neat and concise code to run the function. If you use the Wi-Fi function, it takes two pins to hook your device up to 802.11b/g/n wireless networks. If you use the storage.

Technical Data
Input frequent: 2412MHz to 2484MHz
Input resistant: 50Ω
PA output power(72.2Mbps): 14 to 16dBm
Typical power: 15dBm
PA output power(11b mode): 17.5 to 19.5dBm
Typical power: 18.5dBm
Input low voltage: -0.3 to 0.25*VIO V
Input high voltage: 0.75*VIO to 3.3V
VDDIO(VIO): 1.8 to 3.3V
Features
Arduino, Catduino, Arduino Mega and Catduino Mega compatible
802.11 b/g/n
Wi-Fi Direct (P2P), soft-AP
Internally installed TCP/IP protocol stack
Host Data Rate up to 1 Mbps for UART, 2 Mbps over SPI slave
UART serial port of RN171 on the Shield can be connected to Arduino by jumpers
SPI pin of RN171 is just breakout
Wake up, connect and delivery in 2ms
Secure Wi-Fi authentication WEP-128, WPA-PSK (TKIP), WPA2-PSK (AES)
Built-in networking applications: DHCP client, DNS client, ARP, ICMP ping, FTP, TELNET, HTTP, UDP, TC
Interface
Package List
Wi-Fi shield
Antenna
Usage
hardware Installation
Assemble these parts together like the picture below, and plug the shield with your Arduino/Catduino.
Software Programming
First of all, ensure that Arduino is connected with computer.
Open a new sketch in Arduino-1.0, then copy the following code to your sketch.
#include "Wifly.h"
#include <SoftwareSerial.h>
WiflyClass Wifly(2,3);
void setup()
{
Serial.begin(9600);//use the hardware serial to communicate with the PC
Wifly.init();//Initialize the wifishield
Wifly.setConfig("SSID","PASSWORD");//here to set the ssid and password of the Router
Wifly.join("SSID");
Wifly.checkAssociated();
while(!Wifly.connect("192.168.1.164","90"));//connect the remote service
Wifly.writeToSocket("Connected!");
}
void loop()
{
if(Wifly.canReadFromSocket())
{
Serial.print(Wifly.readFromSocket());
}
if(Serial.available())
{
Wifly.print((char)Serial.read());
}
}
Resource
Program
Datesheet
